|
So you want to take apart your trusty old MessagePad 2000 or 2100? Good luck! Doing this is not for the faint at heart. But if you follow the instructions below closely, you have a good chance not only
to take it apart successfully, but also to reassemble it in a way that you will have a working Newton afterwards, without any leftovers whose initial position in the Newton assembly you seem to be unable to recall.
Click on the images to get a higher resolution image in a new browser window.
If you are already sure you will have to take the Newton apart, for example because the display is broken, lets try to
save some of your data first. If it is still intact and you can still get a serial connection to your desktop (you wouldnt need the display for that), you might want to consider downloading DataRescue (5 kB) before you begin. This little package does nothing but automatically open the Dock and wait for your desktop machine to make contact. You will then be able to back up your data to the desktop computer using the Newton Backup Utilities (PC version or Mac version) or similar software. DataRescue does so when it is installed, i. e.
when a card is inserted or the eMate is reset. In an emergency case like yours it can be installed on a card via a second eMate or an Apple Newton MessagePad.
If your Newtons problem is not a broken display,
make sure that this kind of surgery is really necessary. Check the power supply. Make sure your power adapter works. Works in this context means around 7 volt at the plug that goes into the Newton. Dont continue
if the voltage isnt at least 6 volt. NEVER continue if the voltage is more than 7.5 volt because you can very easily kill your Newton that way.
Remove the battery. Plug in the ac adapter. Normally the Newton
should now power up and tell you that the system rebooted because all power was interrupted. If it does: Congratulations!
Nothing? Well, dont despair just yet. There are still some aces left to play. We will now
enter the wonderful world of resets. Dont run head-first into a wall if the Newton still seems unwilling to come back to life after one of the four reset types described here. Apple says in a tech note that this
might take up to two minutes. I have heard of cases where it took more than five minutes.
Before you start, remove all storage or application cards. Some cards can be damaged during a reset. For a start we will
do a...
Software Reset
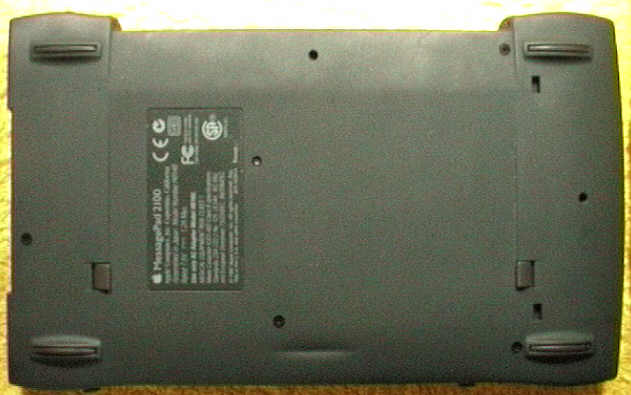
You wont lose any data when performing a software reset. No matter whether the Newton is already turned on or not, press the reset button located on the Newtons underside
for two seconds. Be patient and wait for at least the time mentioned above. If after that time the Newton hasnt answered, it is time for a...
System Reset
When performing a system reset, you risk
losing some information entered on your MessagePad, and you will need to reset your clock and calendar information. I think you will also lose what the Newton has learned about your handwriting.
Remove the
battery. Unplug the power adapter and leave the Newton alone for a few hours. If I were you, I would leave it alone for a day. The Newton 2000 / 2100 models have a gold capacitor that plays the part of the backup
battery earlier Newton models have. Basically this is a capacitor with a very high capacity that can back up your Newtons memory for at least the time it takes you to change the battery. In most cases it can back
it up for a much longer time.
After a day, plug in the power adapter again and pray.
Still nothing? No matter, we will simply play our last but one ace, also known as a...
Hardware Reset
When performing a hardware reset, you risk losing the information most recently entered on your MessagePad.
Press and hold down the reset button for twenty seconds. At some point the Newton will chime and power
on. When it does, release the reset button. The screen will go blank and the Newton will power on again.
As you seem to have read on, I assume the hardware reset hasnt cured things, either. Well, its high time
to get the cannon out and show Newtie whos the boss around here. The cannon is also known as a...
Hard Reset
A hard reset erases all data and information in the Newtons internal memory. This
includes applications that were installed when you bought the Newton (like the Handwriting Instructor, the Newton Tour or Newton Works), and also all applications you installed later. It also erases all information
you have stored, such as name cards, notes, calls and date book entries. It will not remove the built-in programs, the operating system or installed system updates. I honestly hope that you have a very recent
backup. If you dont, rest assured that from now on you will.
Press and hold down the power switch , then press and hold down the reset button for two seconds. Release the reset button. Continue holding down the
power switch until a message appears that asks you if you really want to erase all data. Tap Yes. When you see a second message asking you if you really want to continue because you are going to lose all data, tap
Cancel for now. If the Newton powers up, do a full backup and repeat the hard reset, this time allowing the Newton to erase all data.
Still no success? Ok, then this is where the fun starts! But before we begin, some words of warning...
What you are going to do now will take place very close to delicate electronic parts. Something that will
definitely make these parts very angry is their getting in touch with static electricity. Clothes made of synthetics can be a problem, so can office chairs on a carpet. Humidity plays a role, too. Working in a room
with a wood or tiled floor in which the air is not too dry, and wearing clothes that arent made of synthetics, are your first steps towards a safe reunion with your beloved Newton. Make sure to discharge
yourself frequently before touching it. About the best way to do this is by wearing a grounded wriststrap. If you dont own one, touching a metal faucet or any large piece of metal (like a door, bed frame etc.)
frequently will also help. The same applies to your soldering iron. Unless you have a soldering station with an extra grounding wire, it wont hurt to discharge the tip as frequently and in the same way as yourself.
The good news is that in order to take the Newton apart you can leave your soldering station switched off.
Well, while we are at it... A word on screws and other tiny parts...
Small parts like the 18
screws you are going to remove have a distinct urge to explore their surroundings as soon as they get the chance. They enjoy doing so especially when they smell carpets, preferably long-fibred ones. The frequency of
a given parts attempted jumps is in inverse proportion to its size. And, no matter where it lands, it will always manage to hide even when there is nothing whatsoever to hide behind. And of course, you will never (if
at all) find it anywhere near where you are sure you heard it end up, if you find it at all.
You might want to print some of the pictures below, or you could draw rectangles on a blank sheet and mark them with
the numbers and names mentioned here.
Remove each screw or other small part carefully and tape it to its respective rectangle. Using a magnetized screwdriver will prevent screws from setting up their own
business. If you think you do not have a magnet to magnetize your screwdriver with, you are probably wrong unless you dont have a single loudspeaker around.
|


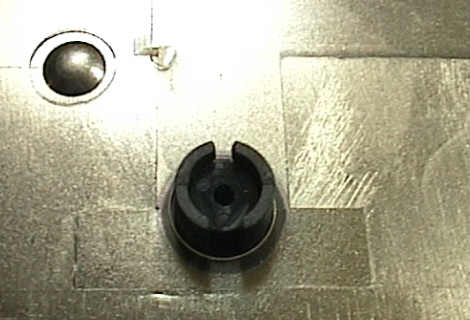
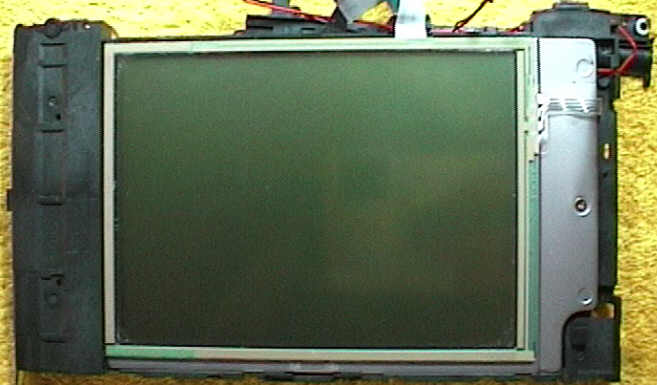
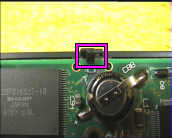
 The IR lens. It is located at the bottom left corner.
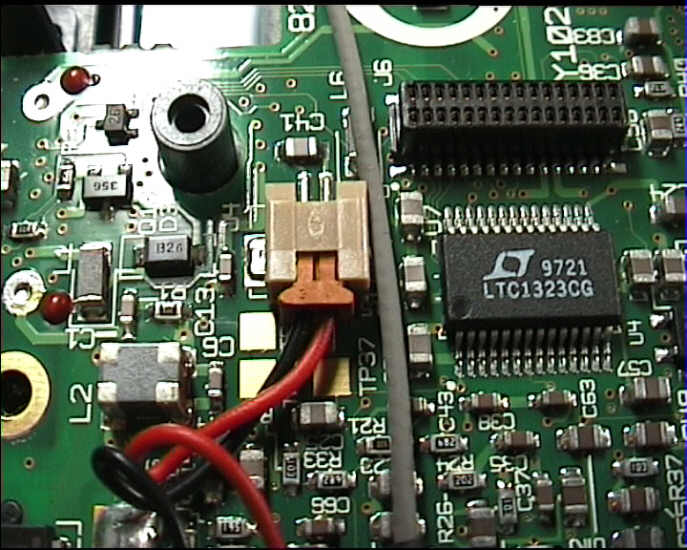
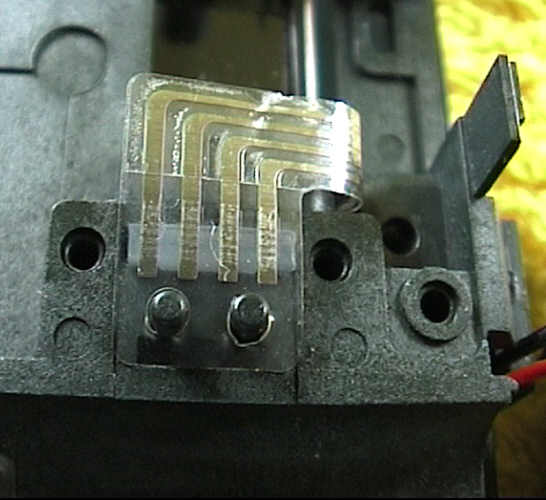
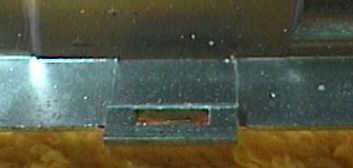
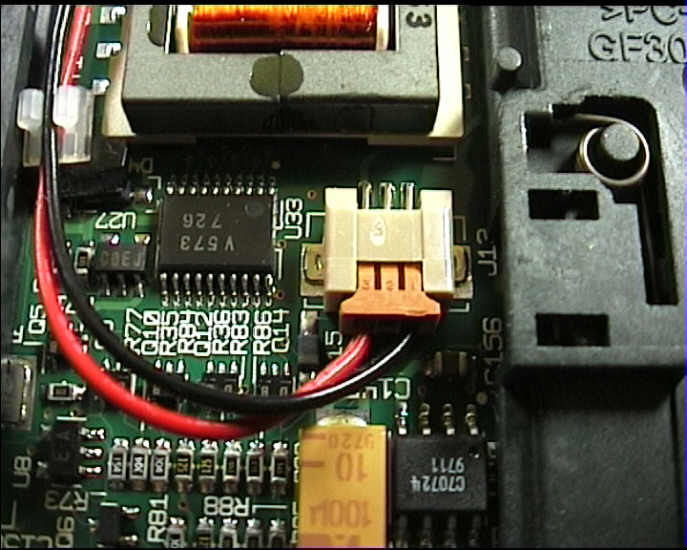
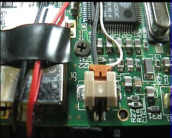 Unplug the microphone connector J5.
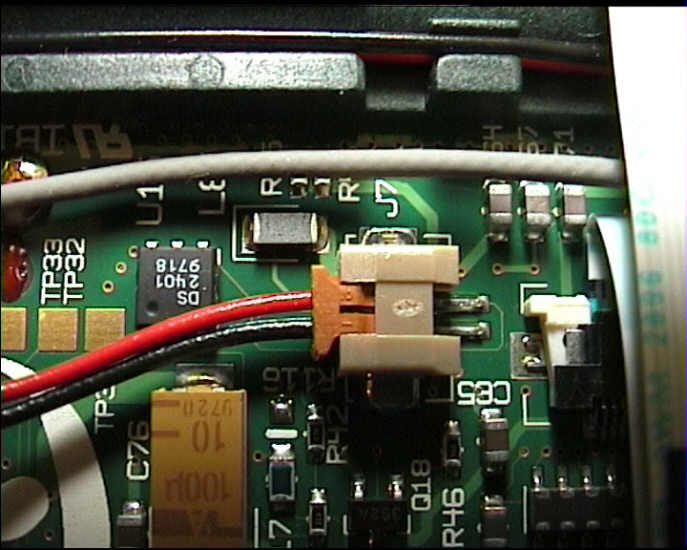


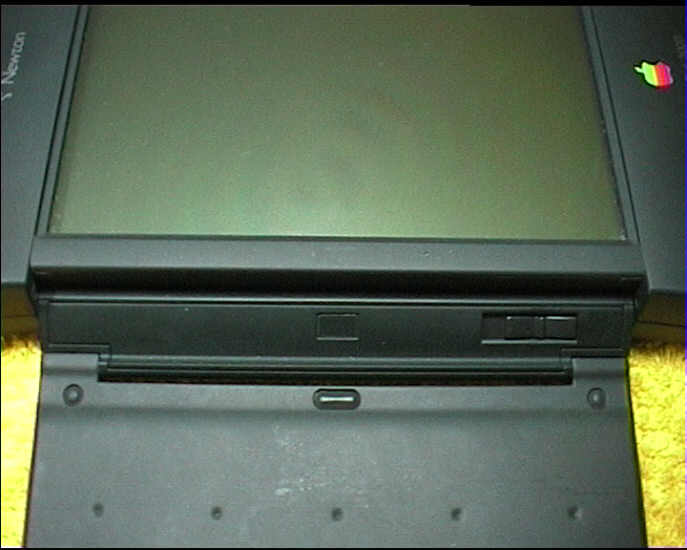
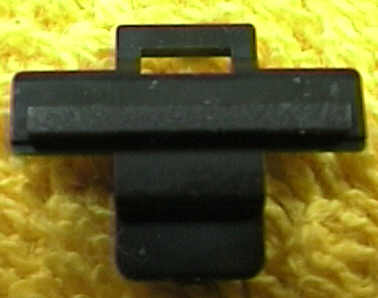
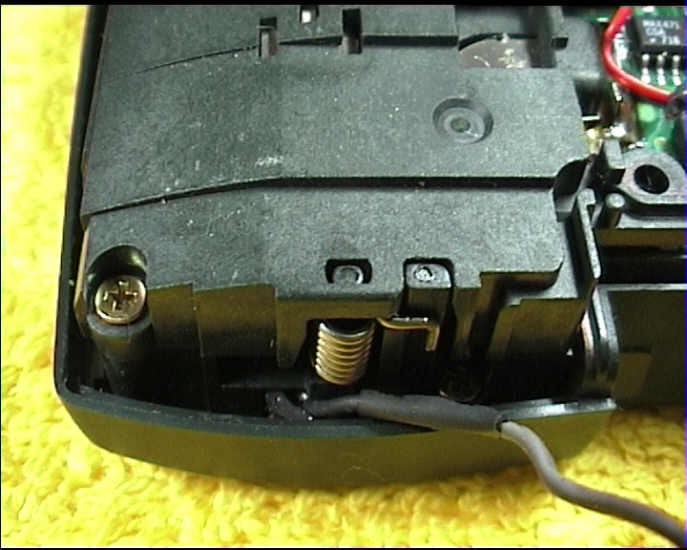
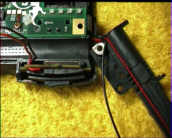 Remove the stylus cover and place it as shown in the picture. Thread the backlight wires out
and put the stylus cover away.
Remove the stylus cover and place it as shown in the picture. Thread the backlight wires out
and put the stylus cover away.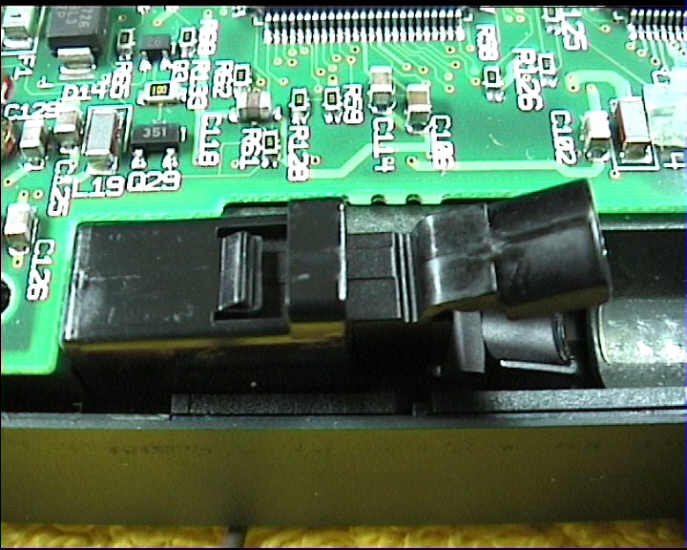
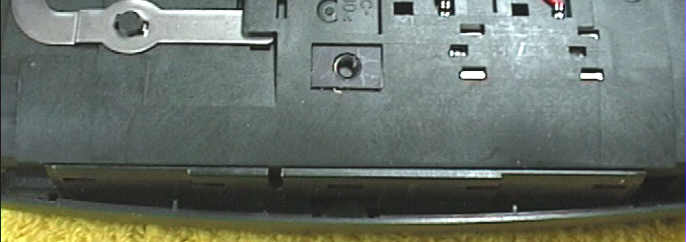
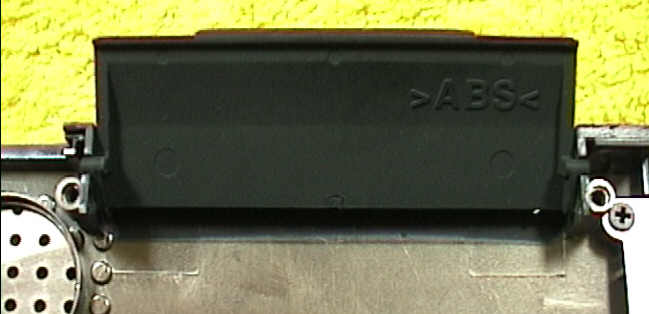
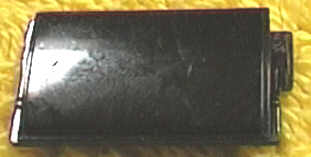
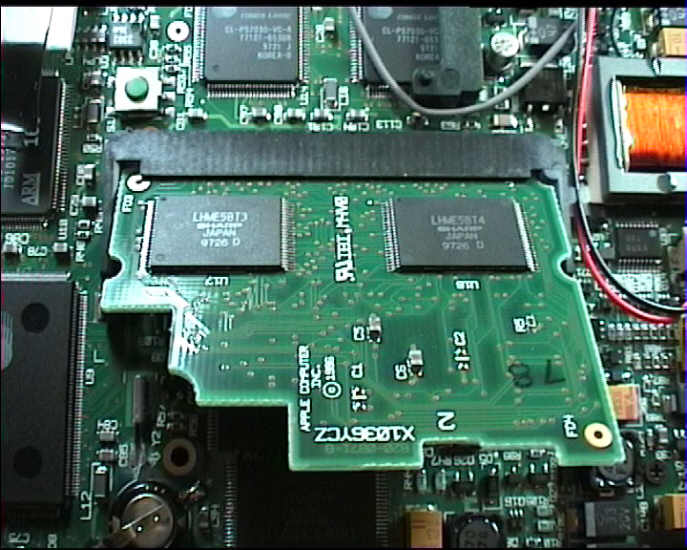
 Put the battery case half on the main logic board.
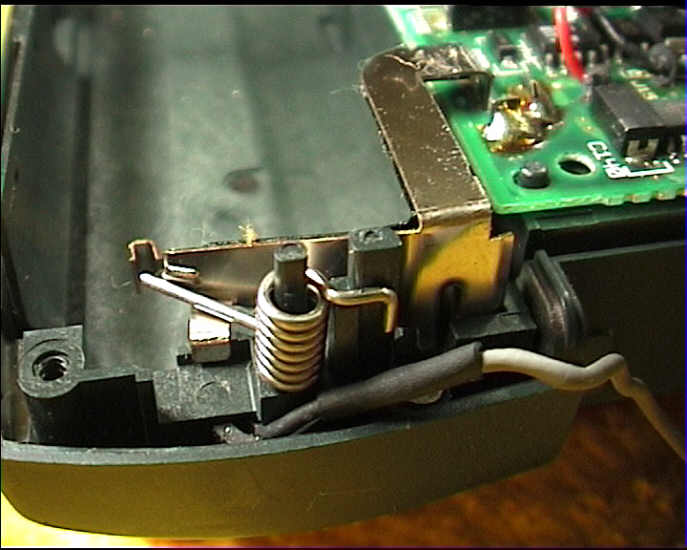

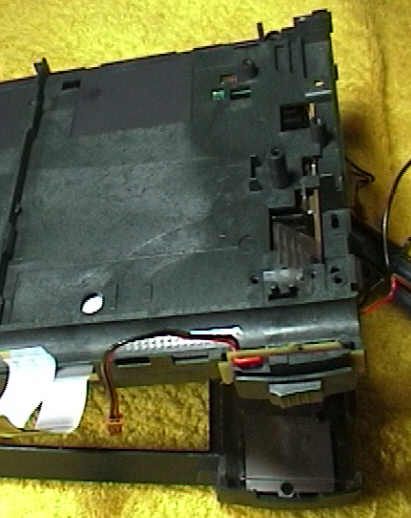
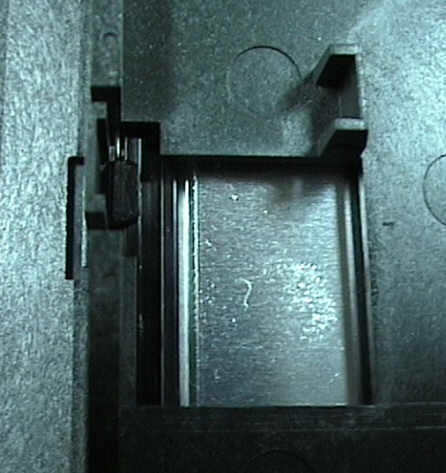
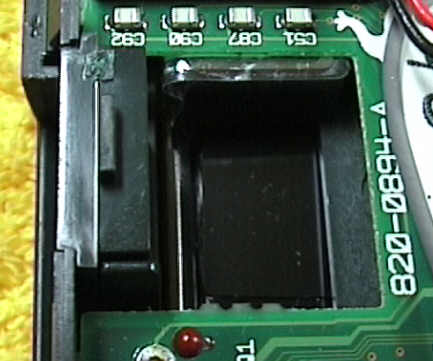
 The catch shown here (henceforth called catch B) is now all that secures the MLB. Press it
outwards and tilt the main logic board up at the left (battery) side. Gently remove the MLB along with the battery case half that is connected to it by two wires, wrap it in aluminum foil
and put it in a safe place. Make sure to leave the fragile card slot mechanism intact.
The catch shown here (henceforth called catch B) is now all that secures the MLB. Press it
outwards and tilt the main logic board up at the left (battery) side. Gently remove the MLB along with the battery case half that is connected to it by two wires, wrap it in aluminum foil
and put it in a safe place. Make sure to leave the fragile card slot mechanism intact.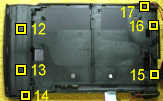 Congratulations! With the MLB safely out of the way, you can now remove another six screws.
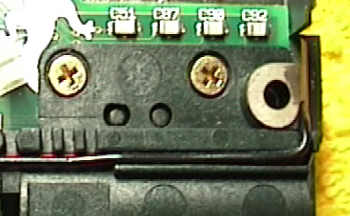
12 and 13 are very tiny ones.
Congratulations! With the MLB safely out of the way, you can now remove another six screws.
12 and 13 are very tiny ones.