|
 Deutsche Version dieser Seite Deutsche Version dieser Seite |
|
|
|
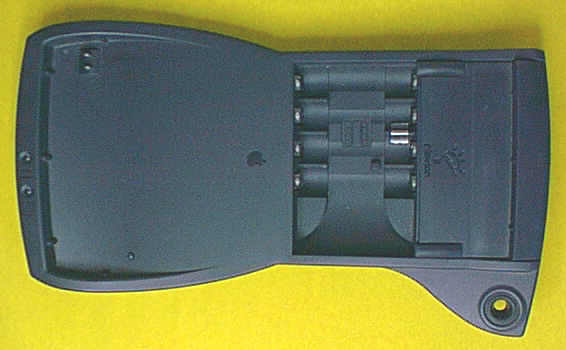
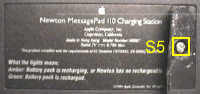
Here are the instructions for taking the battery charging station of an Apple Newton MessagePad 110, 120, or 130 apart. Click on any of the images for a higher resolution image in a new browser window.
|
|
|
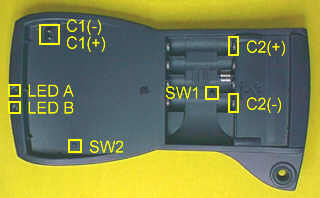 Before starting any disassembly, you should do the following quick
functional test: Before starting any disassembly, you should do the following quick
functional test:
1) Plug in the AC adapter. Do not connect the charging station to a Newton or a battery pack.
2) Measure the voltage across C1. It should be about 7.5 volts.
3) Press switch SW2. LED A should turn amber.
4) Measure the voltage across the outermost battery contacts C2. It should be 0 volts.
5) Press SW1. LED B should turn amber.
6) While keeping SW1 pressed, measure the voltage across C2 again. It should now be about 7.5 volts. This is, by the way, an excellent
opportunity to arouse your spouses interest in Newton hardware by having him or her press SW1 while you measure. This will relieve you of the necessity to grow a third arm at short notice.
7) Insert Apples rechargeable battery pack. You can also insert 4 off-the-shelf NiCad cells if you put a thin piece of
cardboard between the cells and SW1 to keep it pressed. LED B should turn amber and the pack should be charged. Once it is fully charged (after about 2-3 hours), LED B should turn green.
8) Grab your Newton MessagePad 110, 120 or 130 and put in Apple's rechargeable battery pack. As in step 7 you can
apply the magic cardboard trick toto keep down the switch between the middle two cells in the Newton's battery
compartment. Put the Newton on the charging station. LED A should turn amber and the pack should be charged. Once it is fully charged (after about 2-3 hours), LED A should turn green.
No dice? Well, then let's start doing some real work... |
|
|
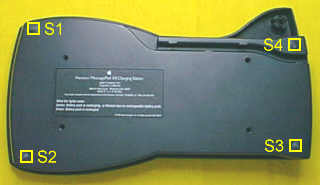 Put the charging station face down and remove screws S1 - S4.
Which screws? Oh, yes, sorry. I forgot to mention that they are hidden beneath the four round rubber feet... Put the charging station face down and remove screws S1 - S4.
Which screws? Oh, yes, sorry. I forgot to mention that they are hidden beneath the four round rubber feet... |
|
|
 ...which you can easily remove with a kitchen knife. Note that S3 and S4 are longer than
S1 and S2. ...which you can easily remove with a kitchen knife. Note that S3 and S4 are longer than
S1 and S2. |
|
|
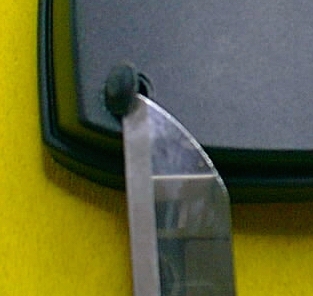
 Using your kitchen knife again, peel off about 2 cm from the right end of the sticker.
There's another screw hidden beneath. Imagining what you would do to Apples case designers if you met them in a dark alley might provide some consolation for the fact
that the sticker will never again look the way it does now. After that you can separate the top and the bottom part of the case. If you prefer leaving the sticker in place and
cutting a hole instead: The center of the hole should be 18 millimeters below and 6 millimeters to the left of the stickers top right corner, the diameter should be about 5 - 6 millimeters. Using your kitchen knife again, peel off about 2 cm from the right end of the sticker.
There's another screw hidden beneath. Imagining what you would do to Apples case designers if you met them in a dark alley might provide some consolation for the fact
that the sticker will never again look the way it does now. After that you can separate the top and the bottom part of the case. If you prefer leaving the sticker in place and
cutting a hole instead: The center of the hole should be 18 millimeters below and 6 millimeters to the left of the stickers top right corner, the diameter should be about 5 - 6 millimeters. |
|
|
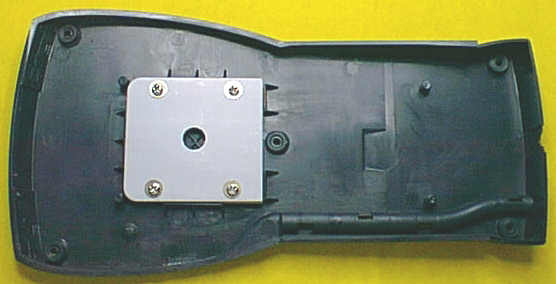
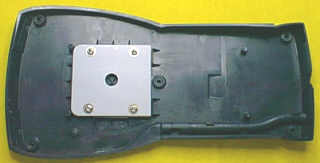 This is what the bottom part looks like from the inside. The three
stacked pieces of sheet metal that are fastened by the four screws have no electrical purpose, their sole job is adding weight. Put this part in a safe place for now. This is what the bottom part looks like from the inside. The three
stacked pieces of sheet metal that are fastened by the four screws have no electrical purpose, their sole job is adding weight. Put this part in a safe place for now. |
|
|
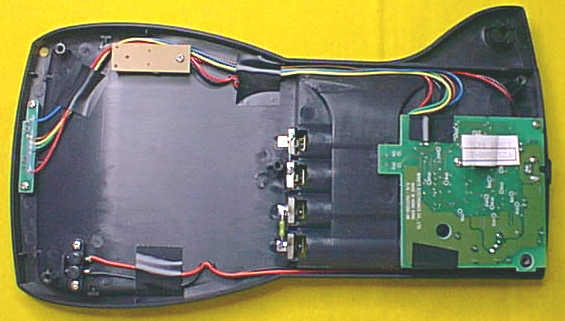
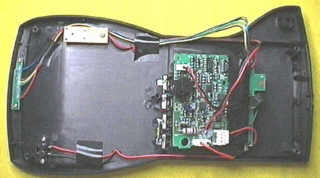
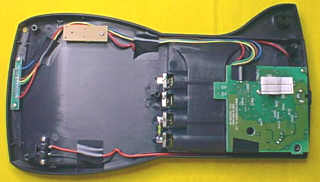 Here is a view of the top part. You will now remove the logic board at
the bottom right corner, unless... Here is a view of the top part. You will now remove the logic board at
the bottom right corner, unless... |
|
|
 ...the charging station charges the batteries in the Newton just fine, but does not charge the
extra battery pack (step 7 would fail). In this case the reason might be the fuse between the two bottom left battery contacts. Measure its resistance (you needn't unsolder it), it should be 0
Ohms (like a wire). ...the charging station charges the batteries in the Newton just fine, but does not charge the
extra battery pack (step 7 would fail). In this case the reason might be the fuse between the two bottom left battery contacts. Measure its resistance (you needn't unsolder it), it should be 0
Ohms (like a wire).
If it isn't, replace the fuse. It is a 5 Ampere type, most likely slow. |
|
|
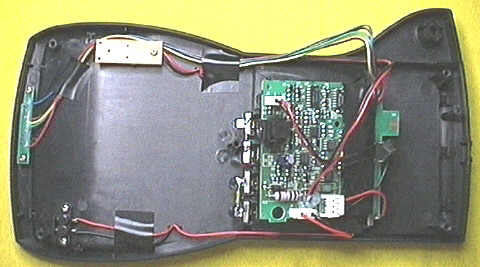
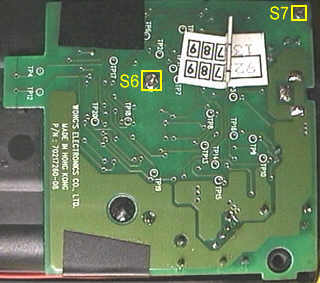 Remove the screws S6 and S7 that hold the printed circuit board
(PCB). Note that S7 has a smaller diameter. Remove the screws S6 and S7 that hold the printed circuit board
(PCB). Note that S7 has a smaller diameter.
Slowly lift the PCB a bit on the left side. |
|
|
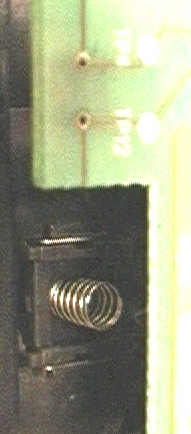
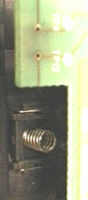 There is a spring inside the temperature sensor which you should remove and put in a safe place. Springs
like that have the tendency to jump towards the carpet as soon as technicians who do not yet know of
their existence give them the slightest chance. Once you prevent this, you should also remove the rubber
part responsible for pressing SW1 which you will find right next to the temperature sensor. If you think
that wont be necessary, let me assure you from personal experience that tiny black rubber parts like that
are constantly tempted to explore their surroundings as soon as you tilt the case. After that they are quite
difficult to find even under the best of circumstances. Finding them in a dark mottled carpet is nearly impossible. What makes things worse is the fact that rubber, unfortunately, wont be attracted by
magnetic force. There is a spring inside the temperature sensor which you should remove and put in a safe place. Springs
like that have the tendency to jump towards the carpet as soon as technicians who do not yet know of
their existence give them the slightest chance. Once you prevent this, you should also remove the rubber
part responsible for pressing SW1 which you will find right next to the temperature sensor. If you think
that wont be necessary, let me assure you from personal experience that tiny black rubber parts like that
are constantly tempted to explore their surroundings as soon as you tilt the case. After that they are quite
difficult to find even under the best of circumstances. Finding them in a dark mottled carpet is nearly impossible. What makes things worse is the fact that rubber, unfortunately, wont be attracted by
magnetic force. |
|
|
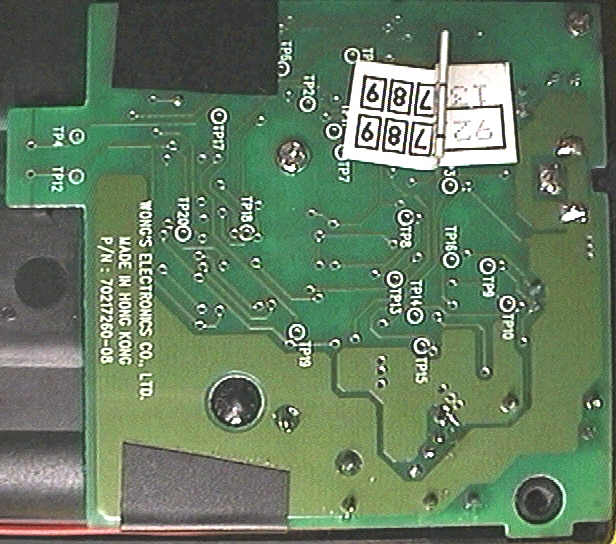
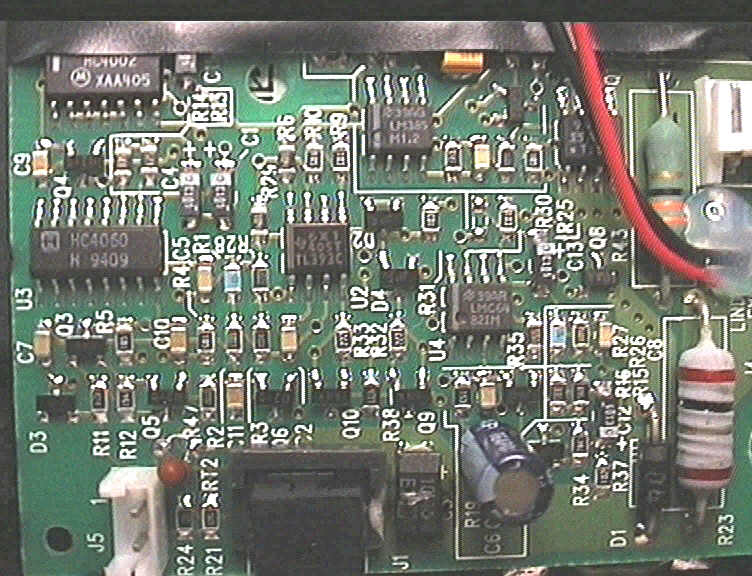
 Turn the the PCB counterclockwise to get at the components. This
picture will help you getting all the cables back in place when you reassemble everything. Turn the the PCB counterclockwise to get at the components. This
picture will help you getting all the cables back in place when you reassemble everything. |
|
|
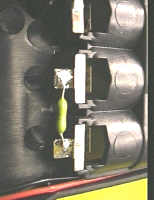
 Here is a close-up picture of the electronic parts. Here is a close-up picture of the electronic parts. |
|
|
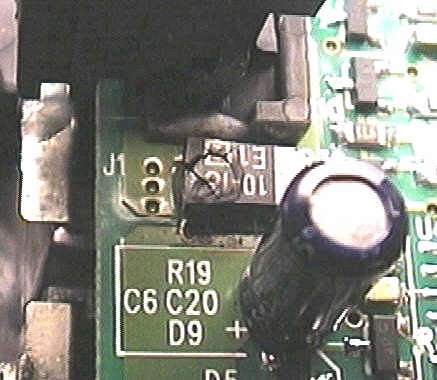
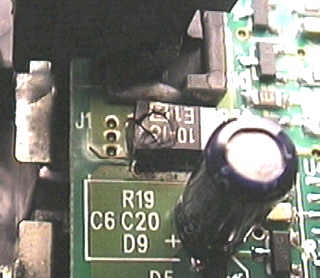 Sometimes a mere visual check will yield a result. In my case it was
pretty obvious that the capacitor directly below the socket for the AC adapter plug (labeled 10-15) was dead. Sometimes a mere visual check will yield a result. In my case it was
pretty obvious that the capacitor directly below the socket for the AC adapter plug (labeled 10-15) was dead. |
|
|
As reassembly is the same as disassembly, only in reverse direction, I wont annoy you with any further pictures. Make sure you put back the spring into the temperature sensor and the small rubber part
that presses SW1 where it belongs. Make sure to turn every screw counterclockwise until you hear a click before fastening it, otherwise it is likely to cut a new thread into the plastic.
|
|
|
Questions? Anything unclear? Any syntax or grammatical errors in this description? Feel free to tell me about it. Yes, really. Dont be polite, be helpful. If you arent, how am I supposed to improve my English?
|
|
|
Nothing like that? This page really helped you? Wow! What a perfect reason to sign my guest book...
|
|
|
Ready for the theory? You will find everything you ever wanted to know about rechargeables and a whole lot more here.
If you happen to be interested in reviews of books on batteries, rechargeables and charging concepts, please see my battery books page.
|
|
|
|
|
|