Keyboard Disassembly

Deutsche Version dieser SeiteDeutsche Version dieser Seite

So you want to take apart your trusty old Newton MessagePad keyboard? Lucky you came here. The good news of the day is that it is pretty easy and straightforward to disassemble a Newton keyboard. So let’s do it...
Click on most of the images to get a higher resolution image in a new browser window. And yeah, a good broadband or cable Internet connection also comes handy to make high-res images load faster.

Screws to removePut the keyboard upside down on a soft cloth. Remove the 6 screws indicated by the arrows.

Case halves partedTurn the keyboard over and carefully prise the top part off. Do not move it too far because it is still connected by two ribbon cables to a printed circuit board that is fastened to the bottom part of the case.

Ribbon cable connectors lockedUnlock the connectors to release the ribbon cables.

Ribbon cable connectors unlockedThis is done by pushing the bottom locking clips at each side towards the cable. Avoid touching the cable’s contacts.

Shielding clip removalRemove the metal shielding clip. You can now separate the two case halves.

Serial cable connector removal 1There will probably be no need to remove the serial cable. If there is, however, you might be in for some ugly and painful skin scratches, especially if this hasn’t been done before. A good way to avoid this is by placing two screwdrivers in the gap between the connector’s body and the locking clips as shown in this picture. Twist the right one clockwise and the left one counterclockwise...

Serial cable connector removal 2...until the gap is wide enough to put one screwdriver into it. Twisting the screwdriver side to side will loosen the connector enough to allow removing it without skin damage.

Logic boardHere is a close-up picture of the logic board. Not much on it, is there? The SC423134P is some kind of controller that appears to have been manufactured by Motorola (to the best of my knowledge Lexmark never manufacured integrated circuits). So far I have been unable to get a datasheet or any description of this circuit. If you have any information on this chip, please let me know.
By the way: just in case you have forgotten what I wrote at the beginning of this page: clicking on most of the images will get you a higher resolution  image in a new browser window.

Key panel from bottom sideStarting from now, but only for a limited time, things will get difficult. For a start, let’s separate the key panel’s frame from the key panel.

Catch closeupIt seems that Apple never intended this to happen. Otherwise they would probably have thought up a less stupid way to hold the two parts together. What you see here (the black part in the middle) is a close-up of a clip.

Catch positions Four of those clips attach the key panel to its frame. They are located where the arrows indicate.

Unlocking the middle clipUnlocking the two middle clips (you can see one above the “9” key) isn’t a problem. Push a screwdriver into the gap to the left of the clip and twist it until the gap is wide enough for the clip to slide over the frame’s edge. Once the gap is wide enough, push the key panel upwards from the bottom side.
Unlocking the outer two clips requires some courage because you will need to apply much more force until the gap is wide enough for the clip to slide over the frame’s edge.

Key panel removedOnce all four clips are unlocked you can tilt the key panel at the side where the clips are and separate it from the frame. Most likely there will not be a green apple in your keybard. I only placed it there to get a sharp picture without having to hold the key panel.

Removing metal partPut the key panel upside down on the soft cloth. Slide the metal part to the left and remove it.

Removing contact foil 1Remove the first contact foil. Note that there are two guidance pins that will help you put everything back together properly later. As with the ribbon cable contacts, one of the worst ideas you ever had would be touching the metal parts of this foil with your bare fingers. Clean the round contacts (and nothing else) with alcohol. Do not use anything abrasive. Do not use solvents. Once the foil is cleaned, put it between two sheets of a lint-free fabric.

Removing insulation foilRemove the insulation foil. There are no contacts on this one.

Removing contact foil 2Remove the second contact foil. Clean and store it the same way as the first.

Removing rubber sheetRemove the rubber sheet.

Key mechanics from bottomHere’s our first glimpse of the key mechanics.

Closeup small keysThe small keys use a simple cylindrical rubber tube as a spring mechanism...

Additional springs big keys...the larger keys have additional wire springs.

Closeup key mechanics from bottomHere is a close-up picture of the bottom side of four keys. So far I have not been able to figure out a damage-free way of disassembling the key mechanics any further. Apple seems to have assembled this in a way that can’t be undone. Hence, I am afraid there is no way to replace, for example, a single key. If you can prove me wrong, please by all means do not hesitate to do so and drop me a line.

Frame supports between which o slide key panel (top) Frame supports between which o slide key panel (bottom)Since I have nothing better to do, I will make this already way too long page even longer by providing some tips that will make putting everything back together a bit easier. Of course, reassembly is the same as disassembly, only in the reverse direction. It wouldn’t normally require any additional explanations. There are, however, some traps that might cause you problems when you are doing this for the first time.
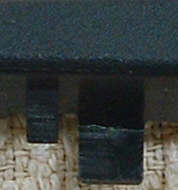
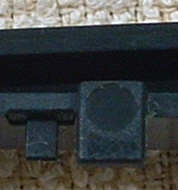
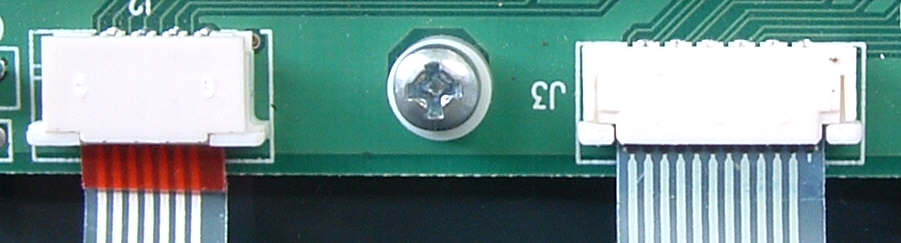
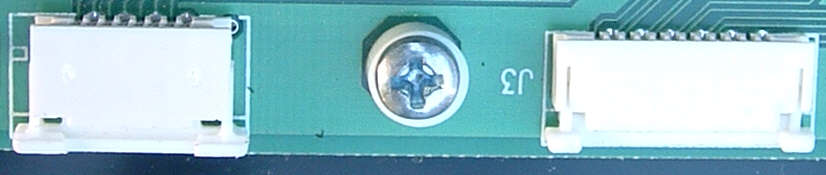
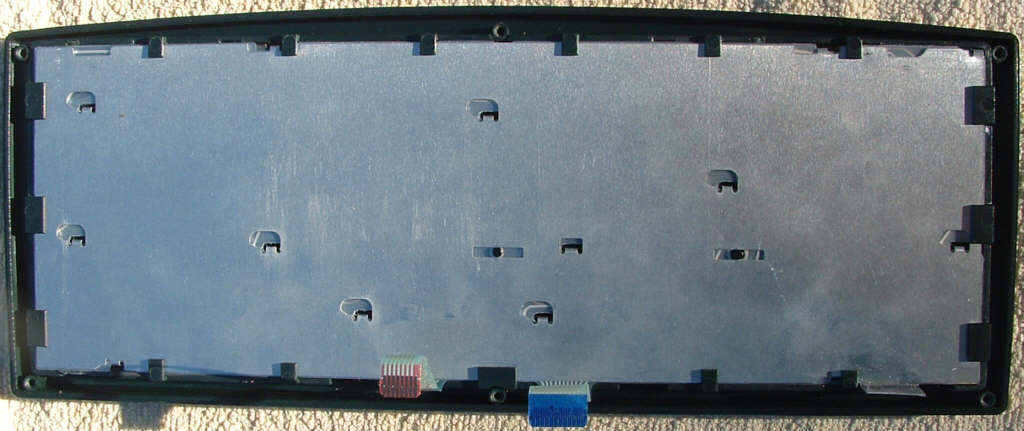
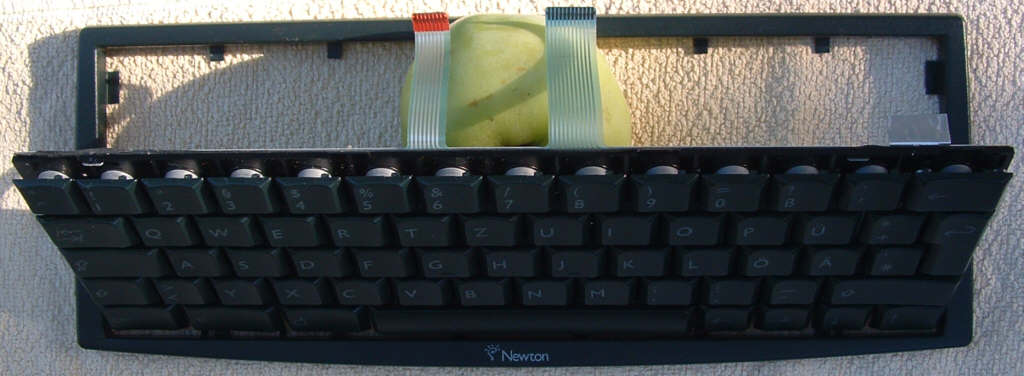
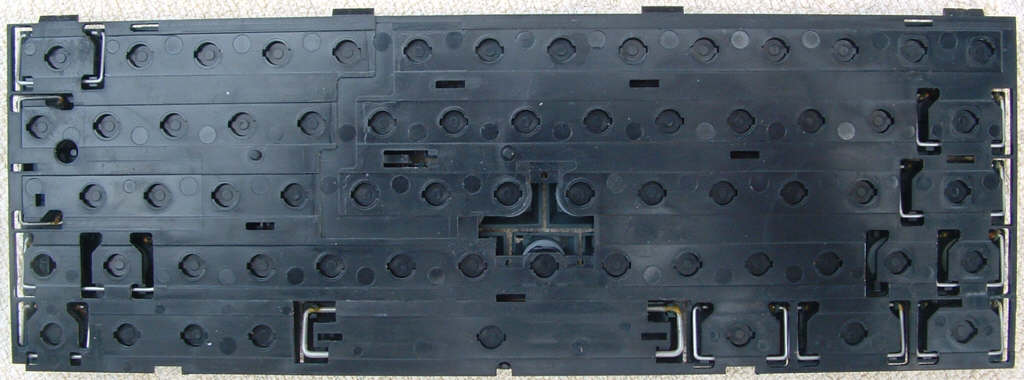
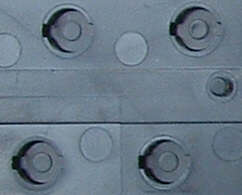
For a start, be aware that the key panel must be pushed between the two supports on the panel’s frame that you see in the picture. The left image shows them from the frame’s outer (top) side, the right one from the inner (bottom) side. They are on the opposite side from the clips.
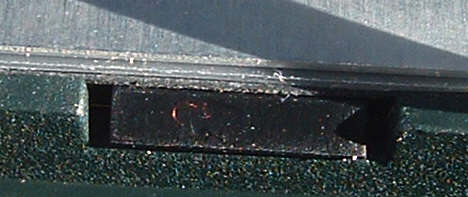
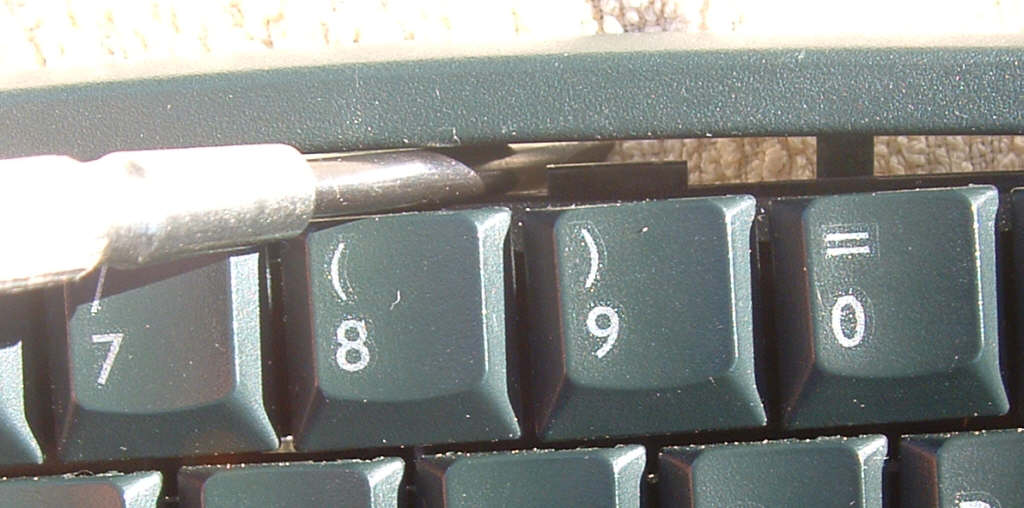
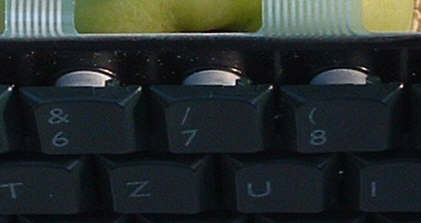
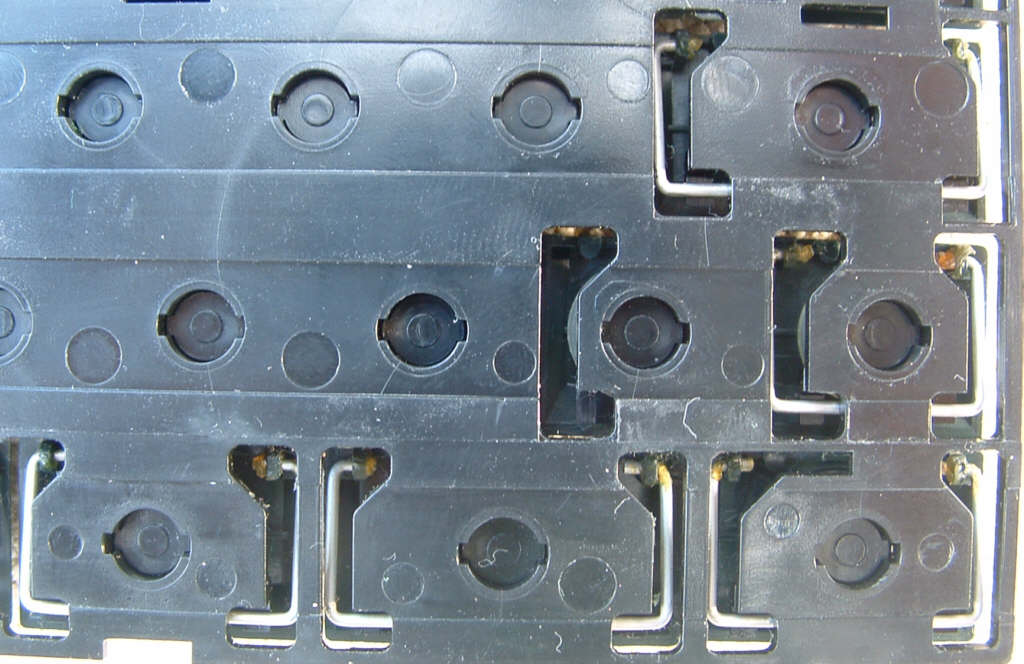
Key panel between support
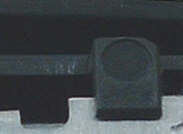
Done. You will have to do this in several places along the bottom edge of the key panel. Push the key panel all the way in when you are ready.

Key panel ready for reassemblyThe current state of affairs should look approximately like what you see here.

Ribbon cables routed wrong wayBut only approximately. If the key panel is pushed back into its frame with the ribbon cables routed the way you see here, said ribbon cables have an excellent chance of becoming history within the next few seconds.

Ribbon cables routed right wayOk, that’s better. Push the four clips back under the frame edge. There are two ways to do this, but only one that is easy on the keys. Place a solid screwdriver vertically on the four clips and push them down until you hear them snap over the frame’s edge. Doing this to the middle two clips is a piece of cake, the outer ones will again require some courage. The benefit of this way is that you won’t have to apply any pressure on the keys themselves.
The other way is doing what you did to get the key panel out, i. e. pushing a screwdriver into the gap next to the clip and twisting it until the gap is wide enough for the clip to slip over the frame’s edge. The problem is that you would have to push on the keys for that, and quite forcefully for the outer clips.
The next time I reassemble a keyboard I am going to try a combination of both ways, this is probably the best strategy.

Bent shielding clip partUnless you put something under the right edge of the frame before you started pushing, the metal strip on which the shielding clip used to be will probably be bent outwards or inwards. Bend it back up if this has happened.

Shielding clip plugged onPlug the shielding clip back on. Put the two ribbon cables back where they belong. Don’t forget to lock their connectors, and don’t touch their contacts.

Cable tie on serial cable
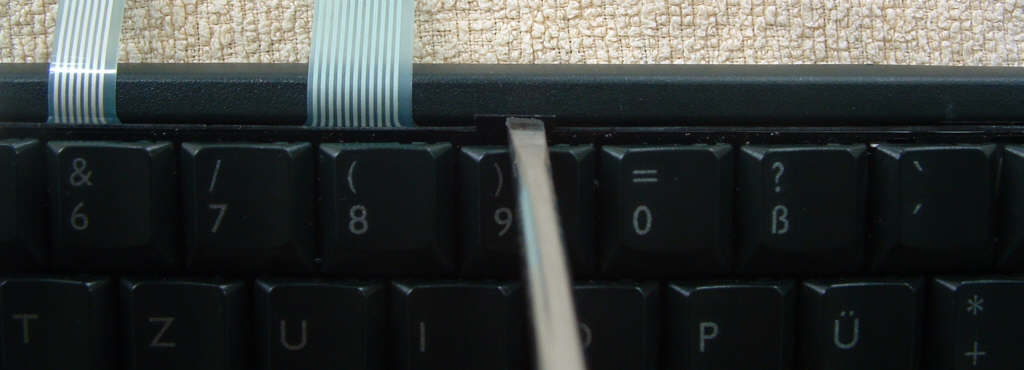
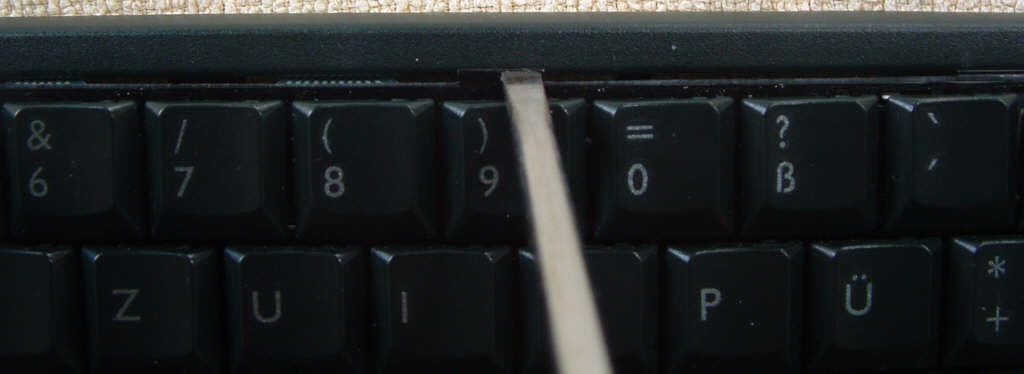
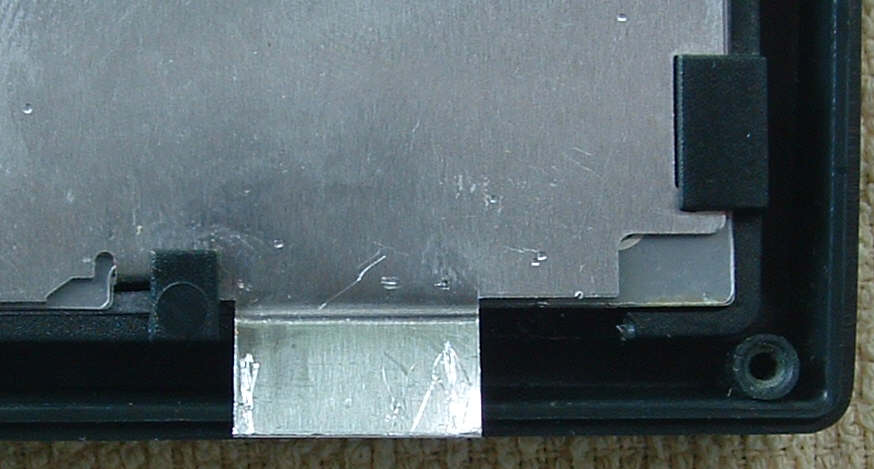
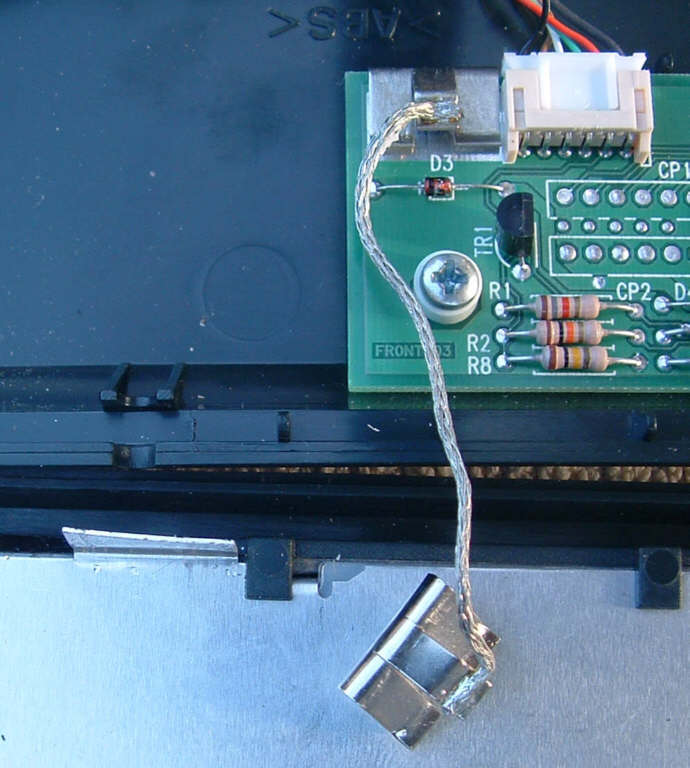
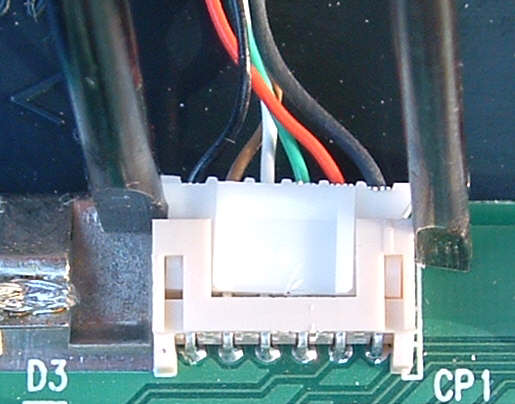
There is a reason even for the cable tie on the serial cable. Quite an important one, in fact. It ensures that you won’t be able to rip the cable out or push it into the case. But only if you place the cable tie in the middle of the groove (slightly above where you see it here).

This is it. Easy and straightforward as I said, wasn’t it? Just in case you have given up all hope of ever being able to do this, why not drop me a line. Maybe I can help you.

Dead links? Questions? Anything unclear? Any syntax or grammatical errors in this description? Feel free to
tell me about it. Yes, really. Don’t be polite, be helpful. If you aren’t, how am I supposed to improve my English?

Nothing like that? This page really helped you? Wow! What a perfect reason to sign my guest book...

[Home] [Site Map] [Software] [Hardware] [Books] [Stories] [This And That] [FAQ] [Cry For Help] [E-Mail] [Guest Book] [Legal Info]